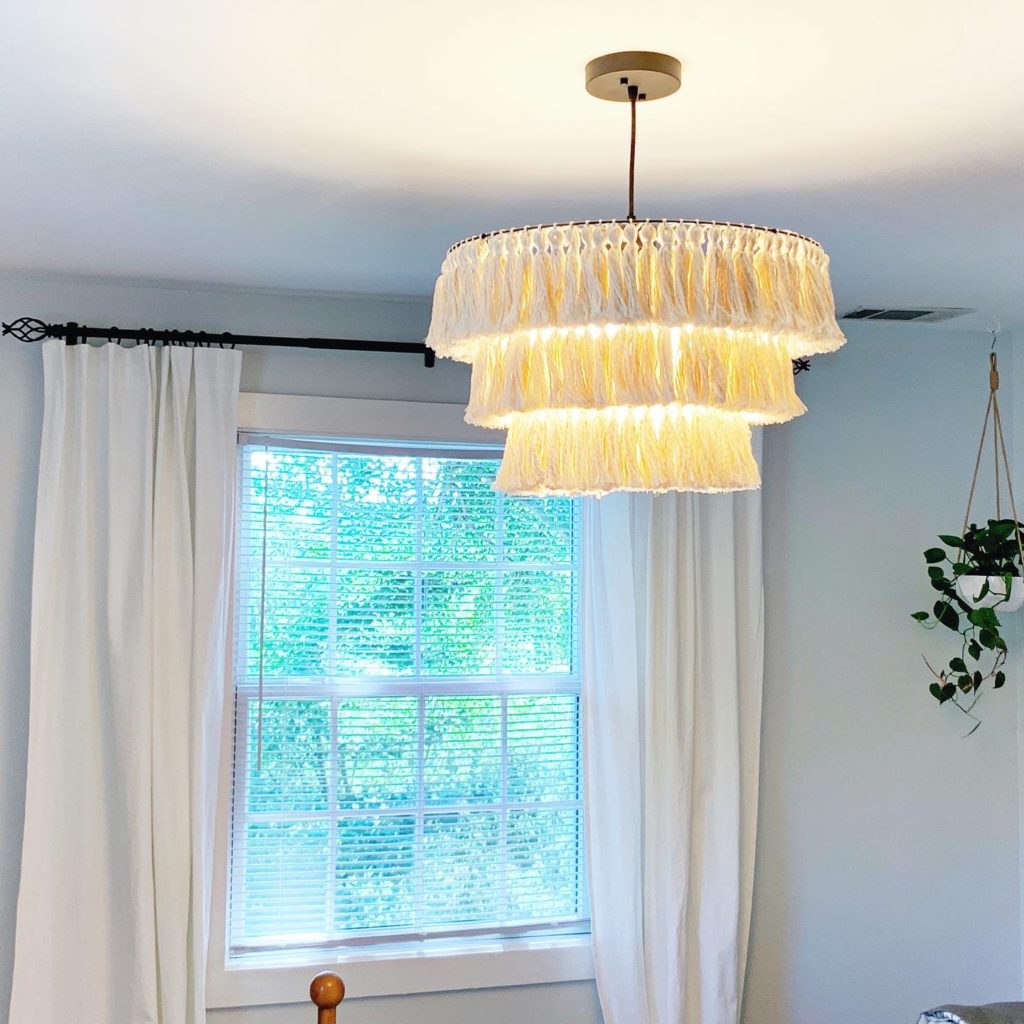
The Anthropologie “Fela Tasseled Chandelier” is the perfect style of light for Eden’s room makeover. The problem? Price. Coming in at $350 +tax & shipping I couldn’t bring myself to pull the trigger. After a week spent studying for my exam (and passing!) it was time for a craft that let my mind take a bit of a break.
What do you need to make an amazing Chandelier??
This post contains affiliate links.
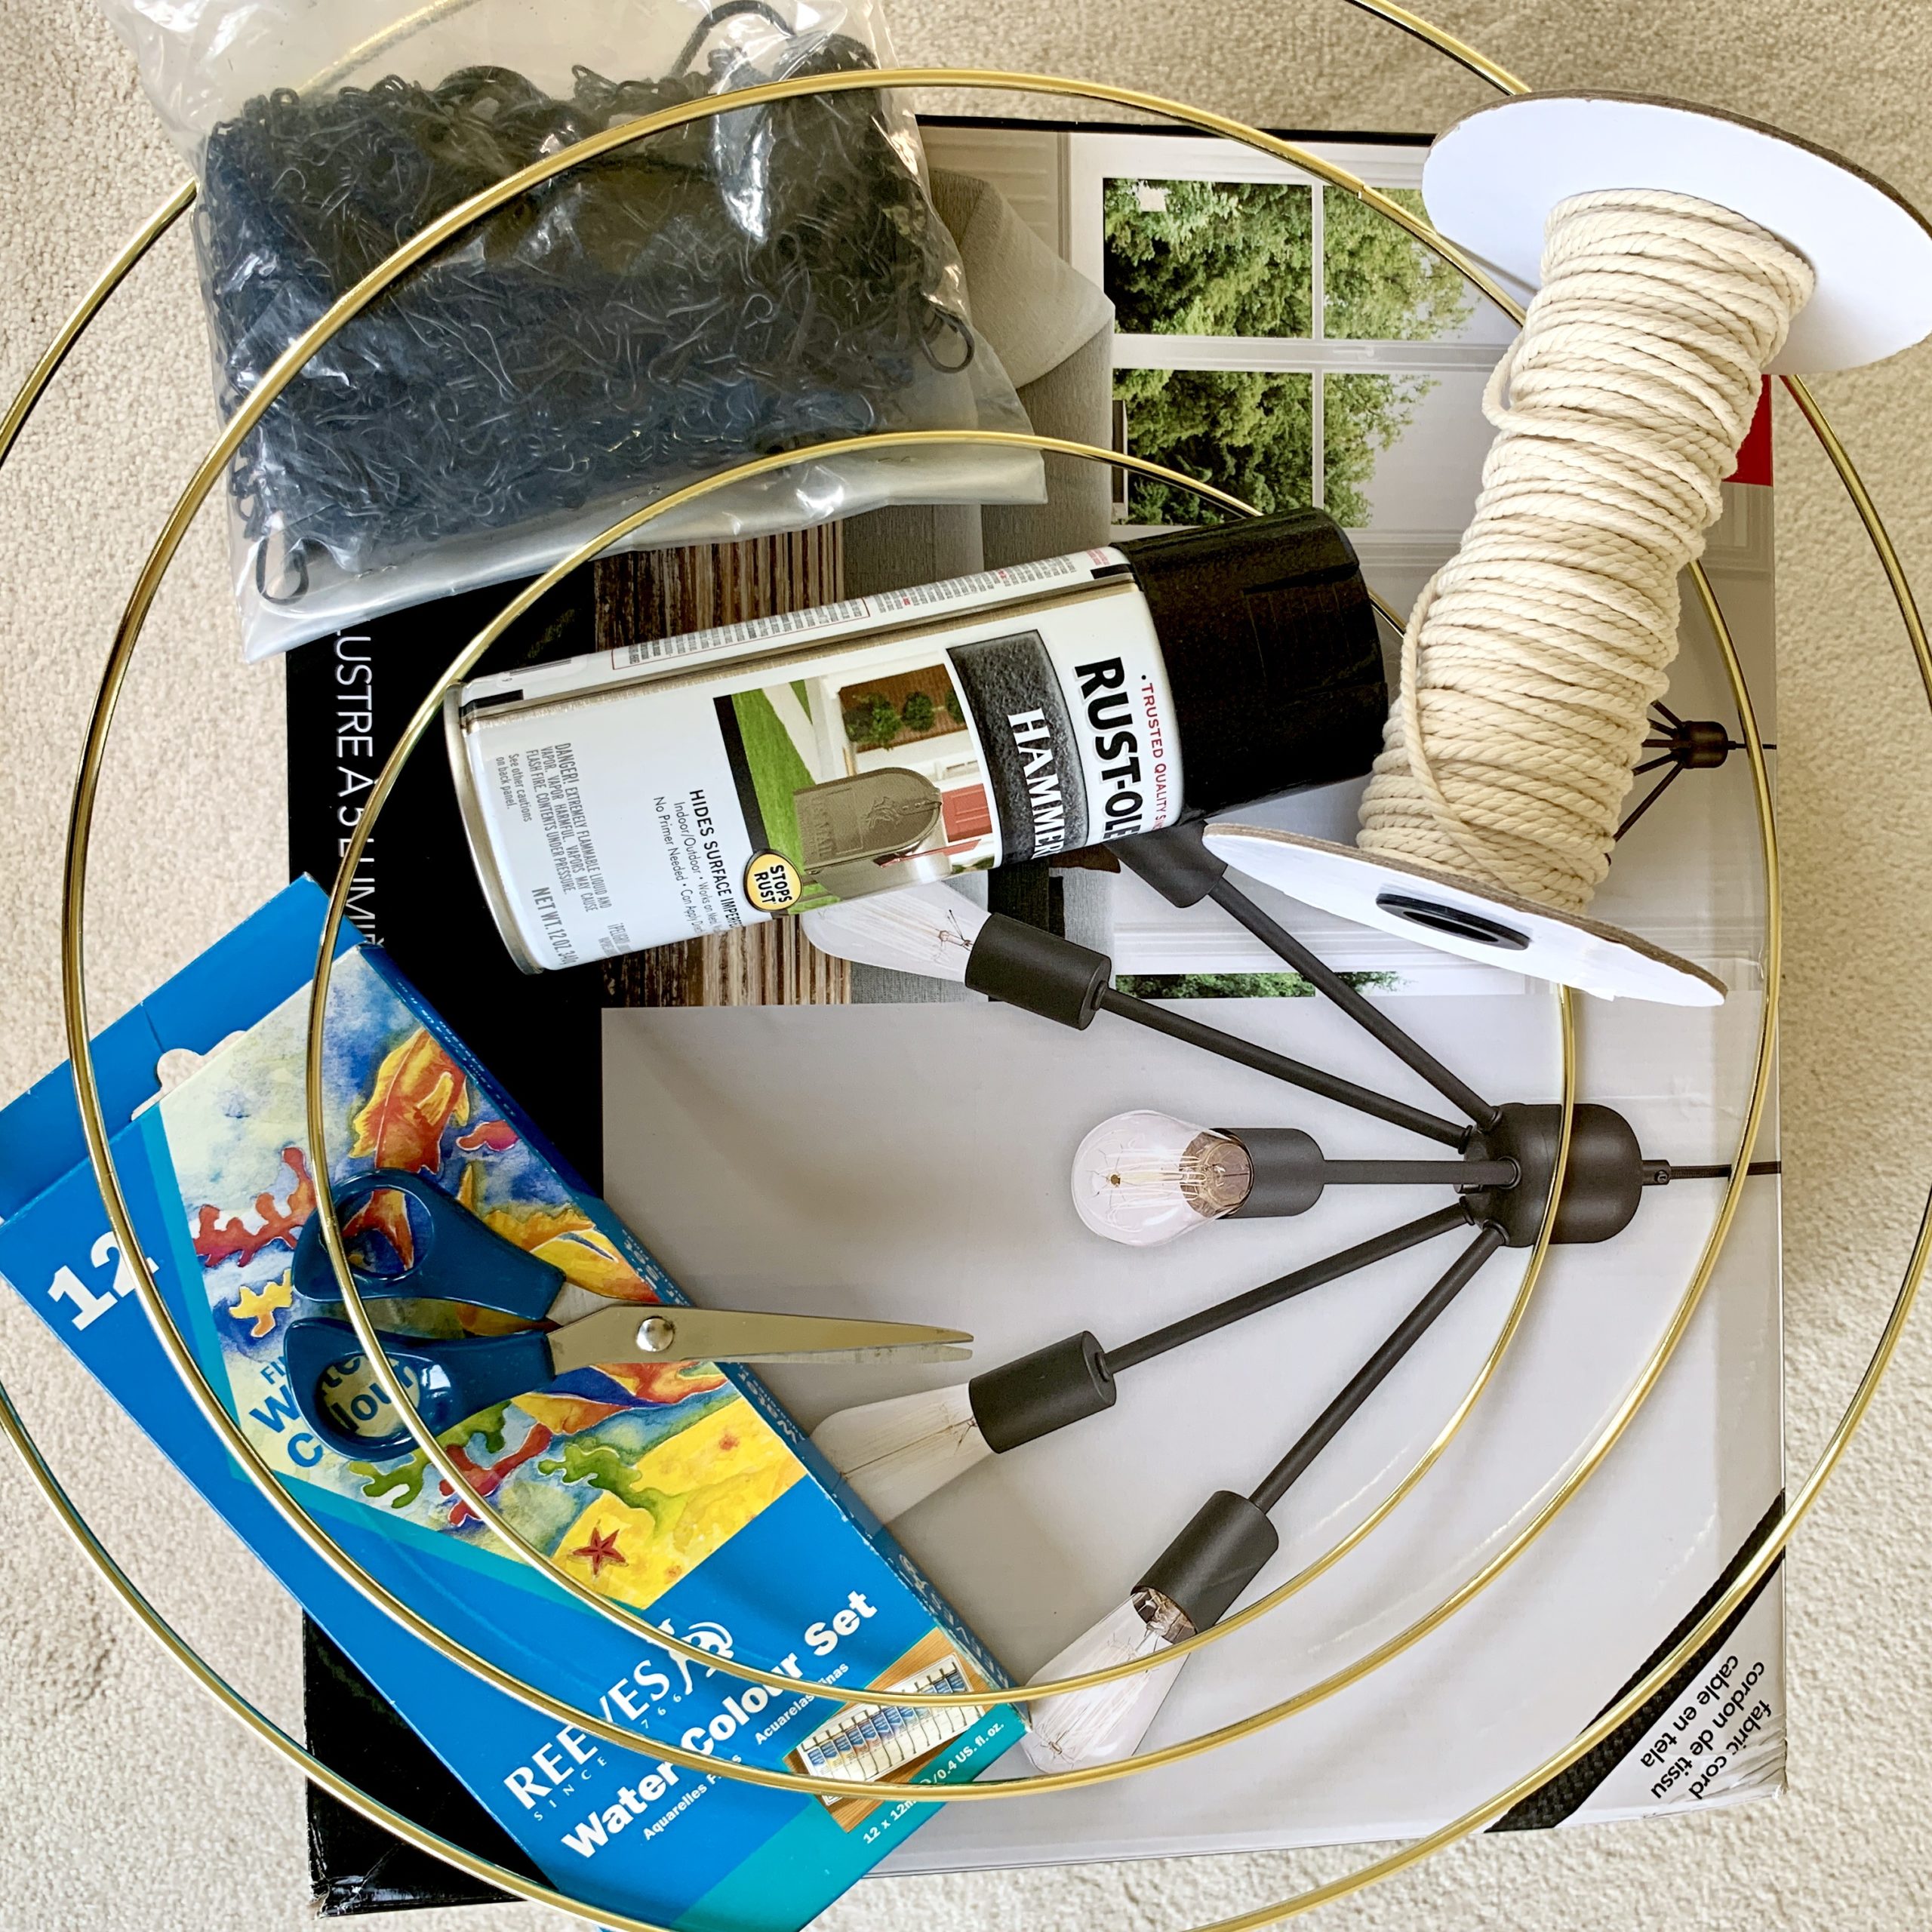
Materials:
-scissors
–metal wreath rings
–macramé string (2 spools)
–chain
-Rustoleum spray paint (I used hammered black)
-something to use as a spacer. I used a watercolor paint box, but a small book, colored pencil box or other object you have on hand can work. The larger the spacer, the longer the tassels will be.
Not Pictured:
-needle-nose pliers
-metal 1″ keyring
-a pencil
Optional:
–light
Total cost: ~$125
The metal wreath rings came in a 6 pack, (two of each size) enough to make two chandeliers. I was worried about their sizing initially but they were perfect!! I used around 1 + 1/4 spools of macramé string. The above link is the kind I used for this project as well the macramé here. There is plenty of leftover chain for future projects, and the extra chains were helpful to temporarily hang the wreath rings as I tied the tassels to them.
In the spirit of total transparency- I thought this light was going to work perfectly without any sort of adjustments. I wanted something affordable with more than three bulbs and it fit the bill. When I opened the box, the light was a lot larger than what I had expected from the measurements online. We had to take apart the fixture, remove the rods, and attach the socket/covers to the base of the light. The pieces were difficult to take apart initially. It was a straightforward re-wire, but if you don’t have experience with electrical work I suggest looking for a different light or using a simple single light pendant as your base. I am not going to give a tutorial for this aspect, or for wiring up the fixture to the ceiling, due to liability. Consult a professional.
Step one:
Spray paint the 3 wreath rings (one of each size) and 1″ keyring. After a few hours flip the rings and paint the other side. This way they will have plenty of time to dry and cure before you assemble the chandelier.
Step two:
It’s time to make tassels! A lot of tassels.
Cutting the lengths:
Smallest ring: 48
Middle ring: 64
Largest ring: 80
Grand total: 192 tassels.
I used macramé string which is three cords twisted together. I cut 64 tassel lengths and 128 lengths of tying string.
Tassel length: Using my watercolor box I wrapped the macramé string around the box 10 times and then cut. It doesn’t have to be super precise, the extra length will get trimmed. Repeat!
Tying string: Using my watercolor box I wrapped the macramé string roughly 1.75x around the box (around 16″ total length). At this point you can cut the string, or double the length as I did in the video below, then cut in the center so you end up with two ~16″ pieces. Repeat!
Now comes the labor intensive part- separating the three cords from each cut macramé piece. The tying strings are fairly short lengths, so separating them goes quickly. For the longer tassel lengths I found that standing helped prevent the cords from tangling up with each other as I worked my way from one end to the middle slowly untwisting the three cords from each other. Go slowly and then loosely wrap individual cords around your hand once untangled so that they are nicely contained in their own little bundle.
You could use a different kind of string, I specifically wanted the “many stranded fluffy look” that this gave *without* having to use tiny strands and wrap them thousands of times.
Making the tassels:
Once you’ve got the strings all separated you can start the assembly! I take one tassel length and wrap it around the watercolor box 11 times. Initially the 3-strand macramé was wrapped 10x, but now that its unraveled into individual strands you will have more length, hence the extra turn.
There are a ton of tassel tying tutorials out there but the is idea is to slide one of the tying strings under the loops but on top of the box, shimmy it to the top of the box, and tie it into a double knot. Gently slide the tassel off of the box. Add the tassel string near the top, then trim the extra lengths. I cut the bottom part of the tassel free by holding on to the top with one hand, sliding my scissors into the loops, and then cutting at the far end while it was pulled fairly tight so that my strings on both sides of the tassel were even.
Then I fluffed the fringe and made sure any strands that stuck together were separated. Overall my tassels were very even and needed minimal trimming post-assembly. This was a huge win in my book! We’ve all seen haircuts that have gone wrong- can you imagine having to remake a bunch of tassels? No, thank you.
Part way though making the tassels I started cutting the bottom fringe part as soon as I slid it off the box, *before* tying the second string on the tassel. The video was taken before I switched the steps around, you can see that some of the loops twisted during the time it was off the box so I had to right them before cutting.
Step three:
Assembly time!
Make 4 evenly spaced marks on each ring with a pencil. This will help guide you when attaching the chain and make it easier to evenly spread out the tassels.
I chose to use 4 points of attachment for the chain so that the chandelier would be more balanced.
Extra lengths of chain temporarily hung the rings in my living room while I worked on the chandelier. I found that working on it while hanging up kept my tassels tangle free and fluffy.
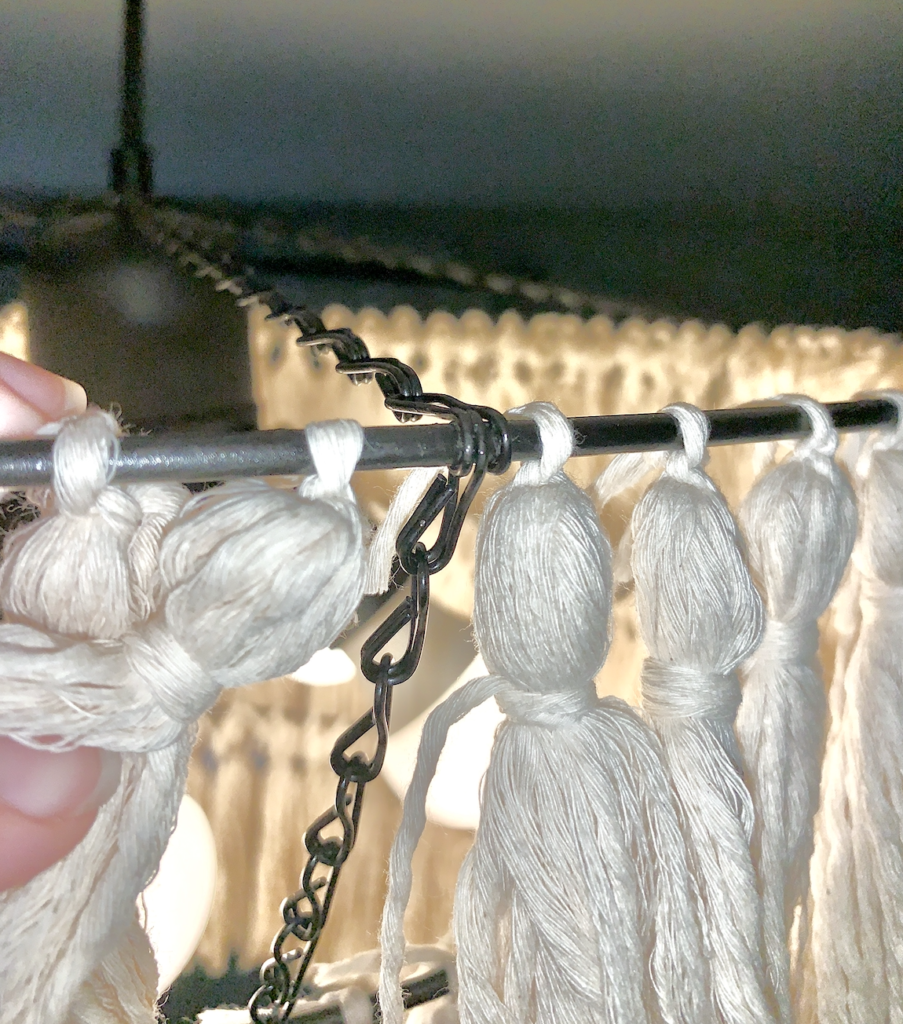
Starting with the smallest ring I attached 12 tassles in each quadrant, 48 total. I used a simple double knot, making sure the knot was formed on the inside of the ring instead of the top when tightened down. Pulling to make sure the knot was tight. I let the extra lengths hang because I wasn’t sure how short I wanted to cut them yet.
After finishing the smallest ring I moved on to the middle ring. 16 tassels per quadrant, 64 total. As you can see the rings aren’t attached to each other yet, and the chain set up here is just temporary. I found it was easier to tie the tassels with the rings separated.
The top ring gets 20 tassels per quadrant, 80 total.
Step four:
Let’s connect those rings!
Using needle-nose pliers I opened up the chain link. On the smallest wreath ring I simply slid the link carefully onto the wire ring in the location of one of the pencil marks and re-bent it. If you’re too rough it will scratch the spray paint.
When attaching the chain to the next highest tier you’ll need to not only un-bend the link, but also open it up width wise to slide it on so that the wreath ring runs within the chain link interior. Then you can push the width back together with your fingers, and re-bend the pronged part with the pliers after connecting the chain from the lower tier.
Let me show you:
I tweaked the photo to help the chain links show up better.
See how the chain link that starts the connection between the top tier ring and middle tier has the top tier ring running through the middle? The lower part connects the chain links below as usual.
I made sure that all of my chain lengths were straight and free from twists before tightening the link connections. Additionally all of my connecting links face the same direction. It’s the little things!
When two chains meet on a tier ring I placed the links so that the top link sandwiches the link connecting to the lower tier. This way there was one even line of chain moving up each quadrant and then to the center of the chandelier. I threaded the 1″ keyring onto the top of the light fixture so it simply rests on top of the base. The last links from each of the 4 strands at the top of the light attach to this point.
-There are 7 links between each tier
(8 lengths of 7 links, 4 for the bottom tier to connect to the middle tier, 4 for the middle tier to connect to the top tier)
-There are 15 links connecting the top tier to the keyring in the center of the chandelier.
(4 lengths of 15 links, top tier to center keyring)
If you make your tassels larger or smaller, or use a different kind of chain, you’ll need to adjust the length of your chain to suit your needs.
Tassels measure a heavy 4 3/8″ from top of the “ball” portion to the bottom of the fringe.
Total tassel length is 5″ when measuring from the top of the wreath ring to the bottom of the tassel.
Step 5
Trim up the strings! I decided to leave a little bit of length so that the cut stings hung down, I didn’t want them to be too light and stick up straight.
Step 6
Add your light if desired and hang that masterpiece up! Enjoy your beautiful new chandelier!!
*Mom Homework is reader supported. If you buy though links on our site, we may receive a small commission. This does NOT result in any additional cost to you. As always, all affiliate links are for products that we have purchased and used. You can read more here.

[…] light Tassel Chandelier from Momhomework […]