There’s a part in Shrek, where Shrek is talking to Donkey. He tells him that “Ogres, are like onions. They have layers”
Well, The Palace is like an ogre. Or an onion. It has layers. Many, many layers.
It’s one thing to go into a house knowing it’s a gut job, but in this case we were thinking superficial fixes.
As we peel back each of the layers we find more that is wrong, and more that needs to be removed. Thinking because it was lived in and maintained, it would be okay.
Everything is wrong.
Every update is flat out unsafe, or covered up issues that should have been addressed.
Who finishes a basement they know is wet?
Who spends time and money on a kitchen or bathroom renovation, when the roof is leaking and the floor joists are failing? How does adding ANOTHER layer of tile and hundreds of pounds of weight help this??
At this point we have filled three 15 yard dumpsters, (okay, one of those was also for roofing) and we are 75% full with dumpster #4.
This past Monday I fogged the entire house, killing any remaining mold spores. I was surprised by the improvement in smell after the fog had done its thing.
It still smells, don’t get me wrong, but it’s getting better.
Basement
We have removed all of the drywall, studs, and the ceiling in the basement, as well as in the garage.
We still need to do some demo on one of the basement stair walls to open it up to the room.
This weekend we are going to haul out all of stone from the fireplace that is still in the corner.
Waterproofing and the structural repairs begin on Monday!!
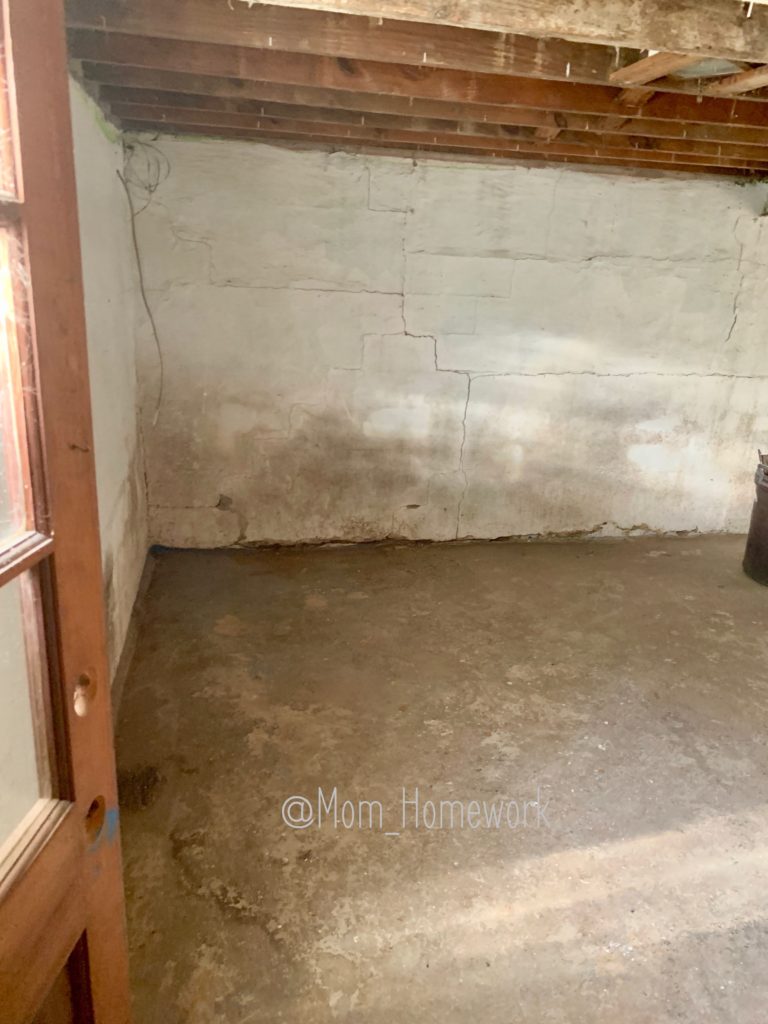
See- the basement floor is finally dry! We have had the dehumidifier and air scrubber running constantly.

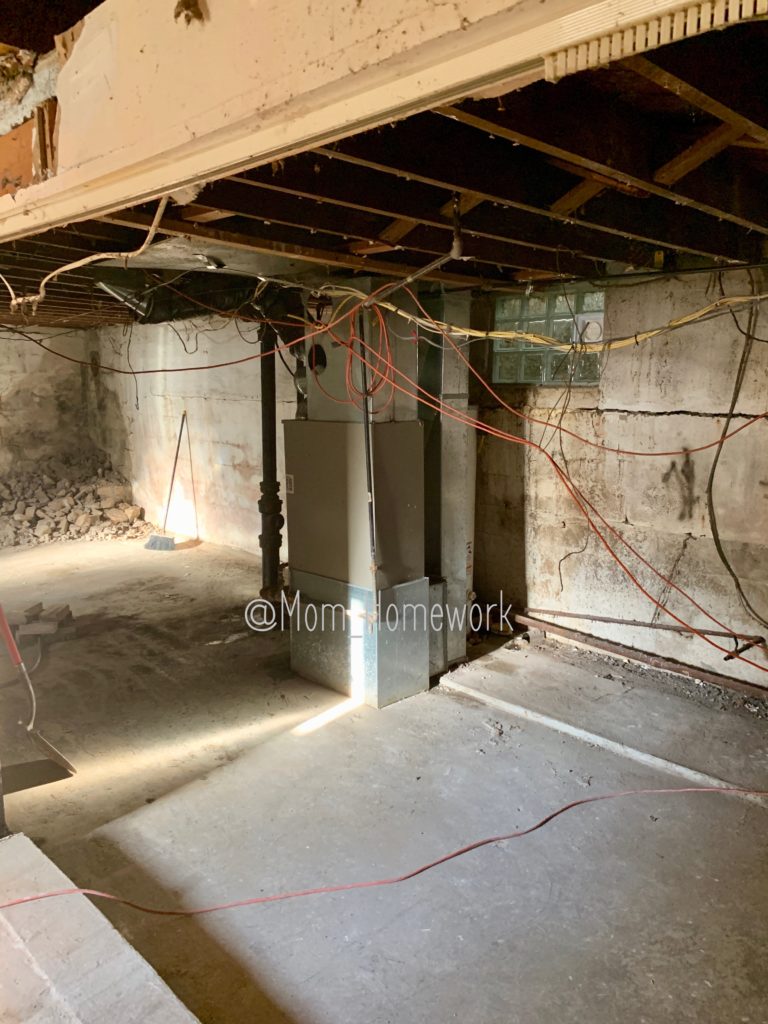
Note how the laundry room (front area) is now open to the “utility room” (where the furnace is) and flows into the basement living space (back area).
How nice to have interior spaces connect.
Luckily there weren’t any more snakes!
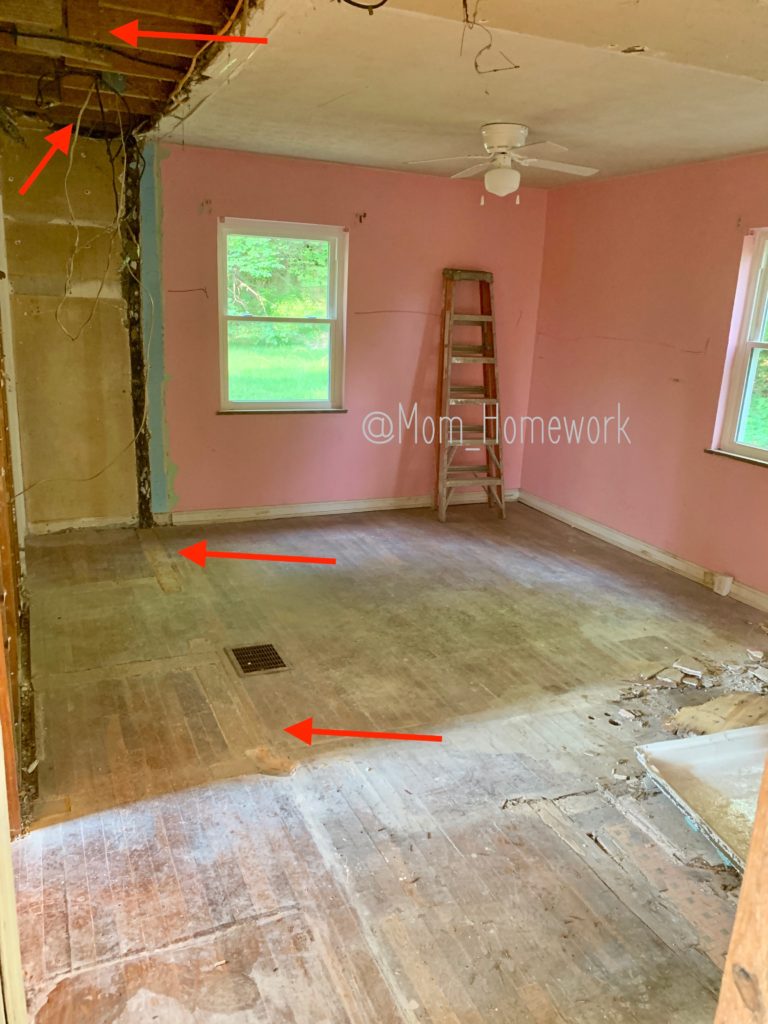
Second Floor
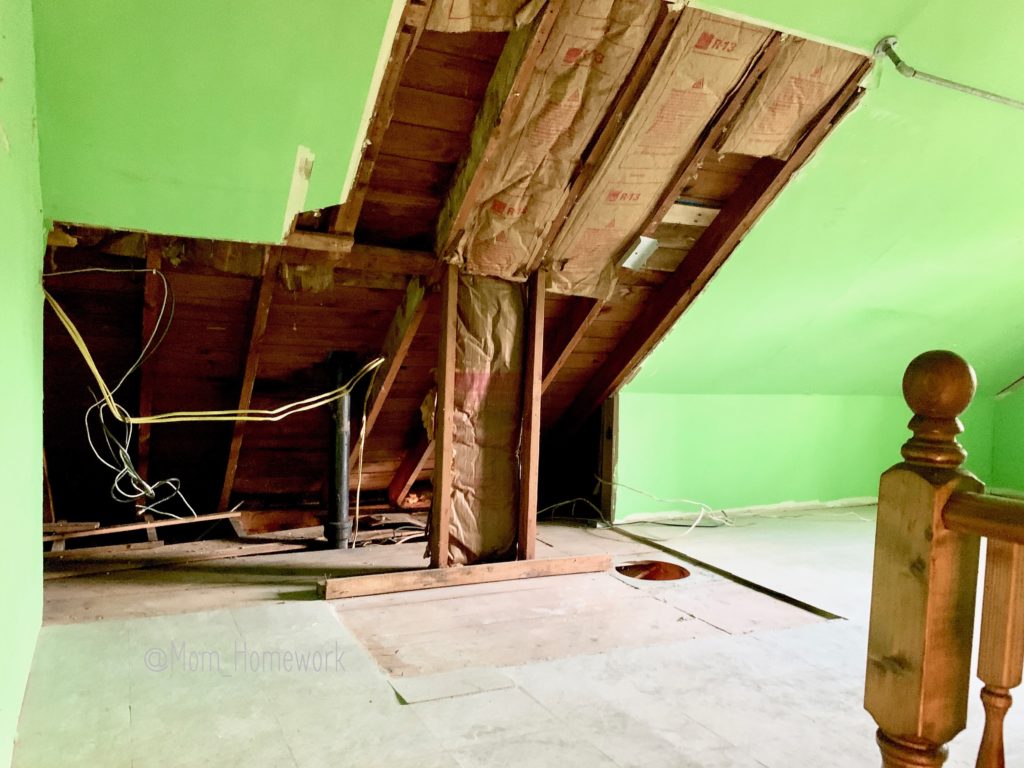
The closet that was on the second floor has been demoed, making room for the bathroom.
All of the random wood strips on the walls also found their way into the dumpster.
Next up is the removal of the flooring in the left bedroom so that we can have floors that match.
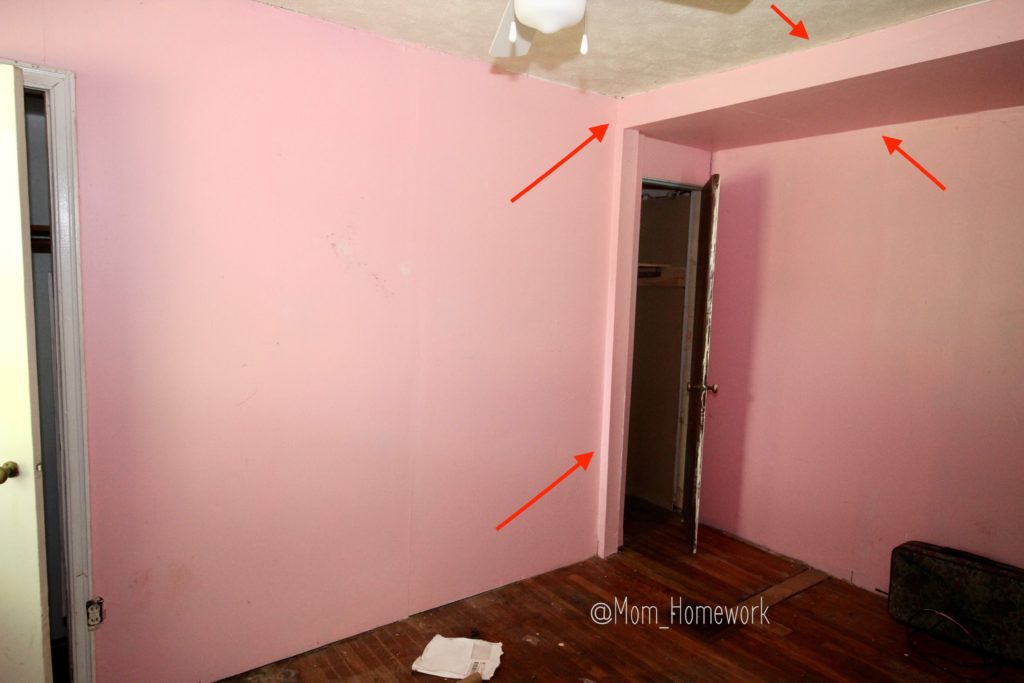
First Floor Bedroom
The random drop down in the pink bedroom was removed. This was hiding the fact that the previous owner had removed the structural walls supporting the second floor.
Welp, that needs to be fixed!
The floor joists for that section have visibly dropped compared to the side that is supported. It’s at least 2-3″ of drop and it bounces nicely when you walk on it.
There was no header in place, the drywall did nothing but hide electrical wiring.
Bathroom
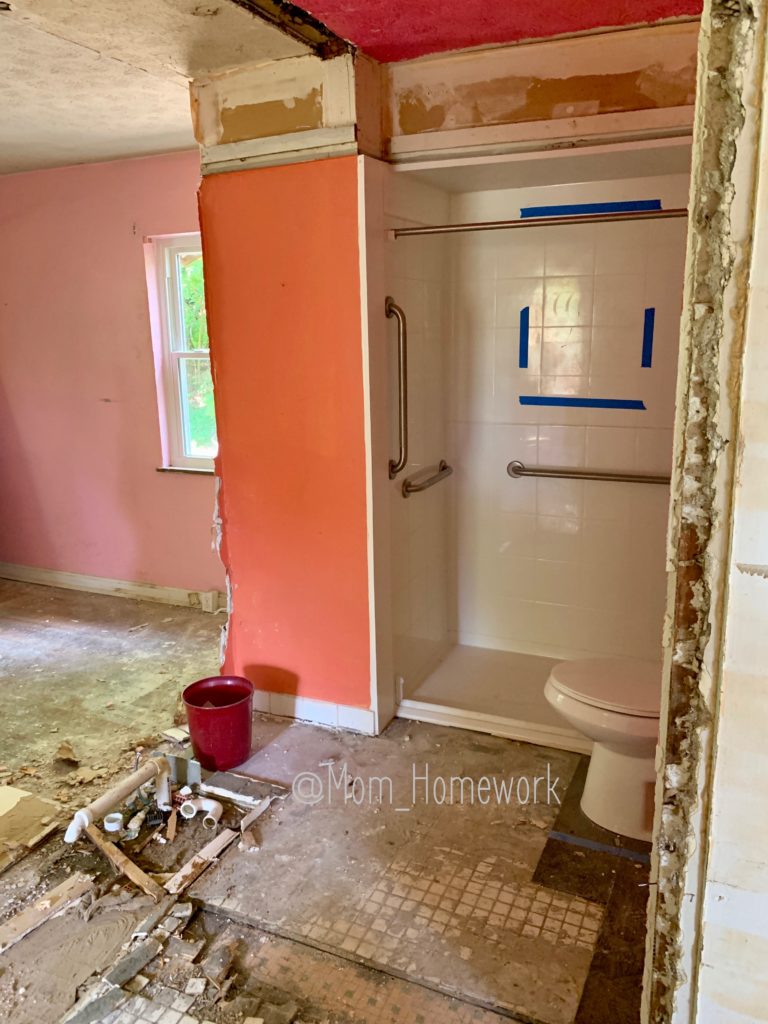
Here is the bathroom originally:
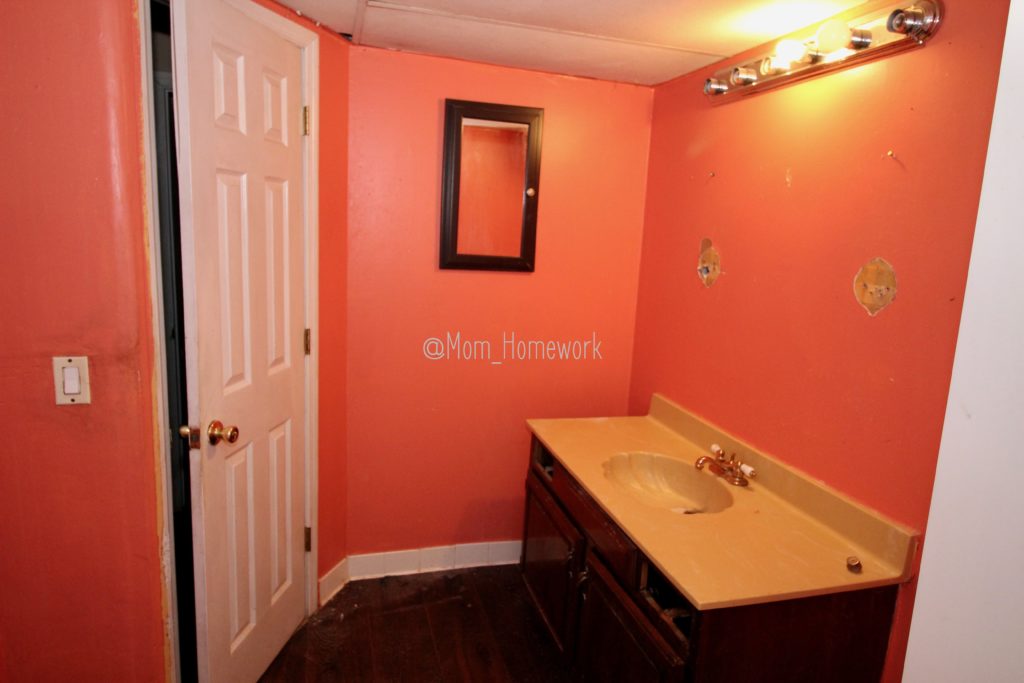
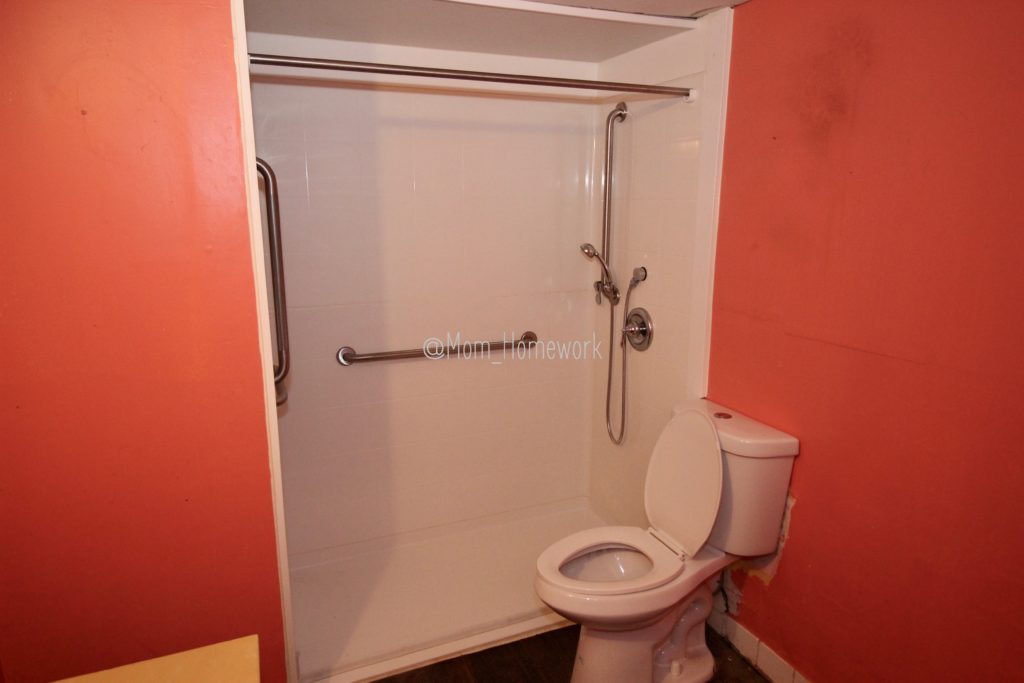
Not horrible, but room for improvement.
What you can’t see is the fire hazard above the dropped ceiling that was DIY electric gone wrong.
Or the window behind the shower surround.
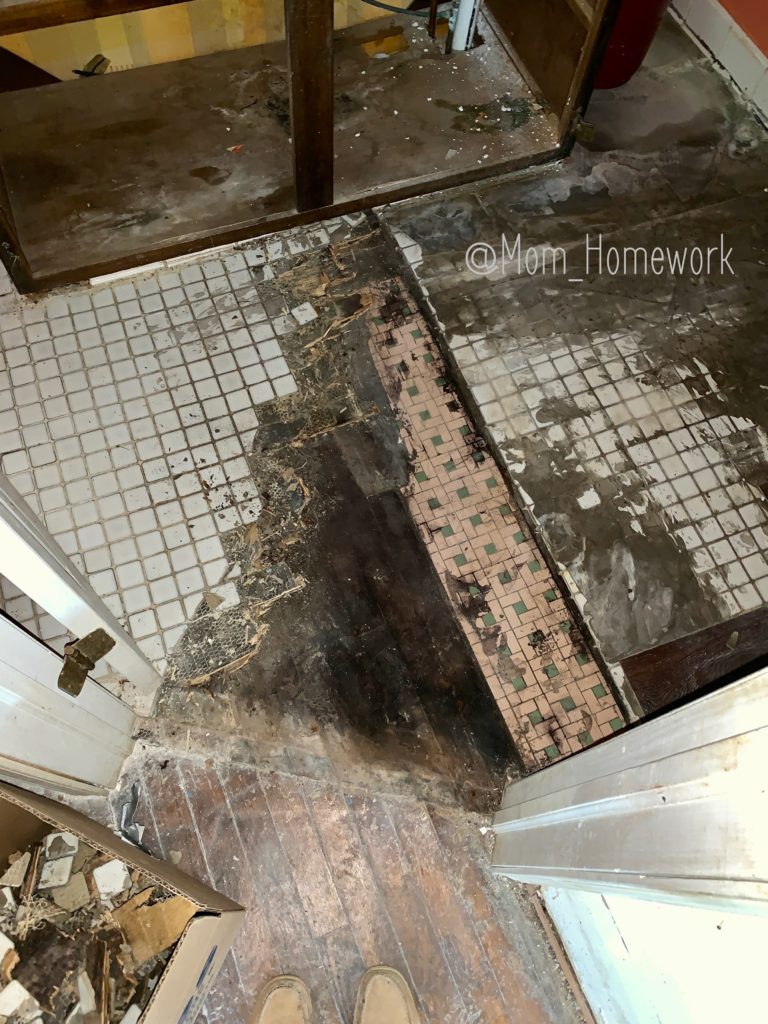
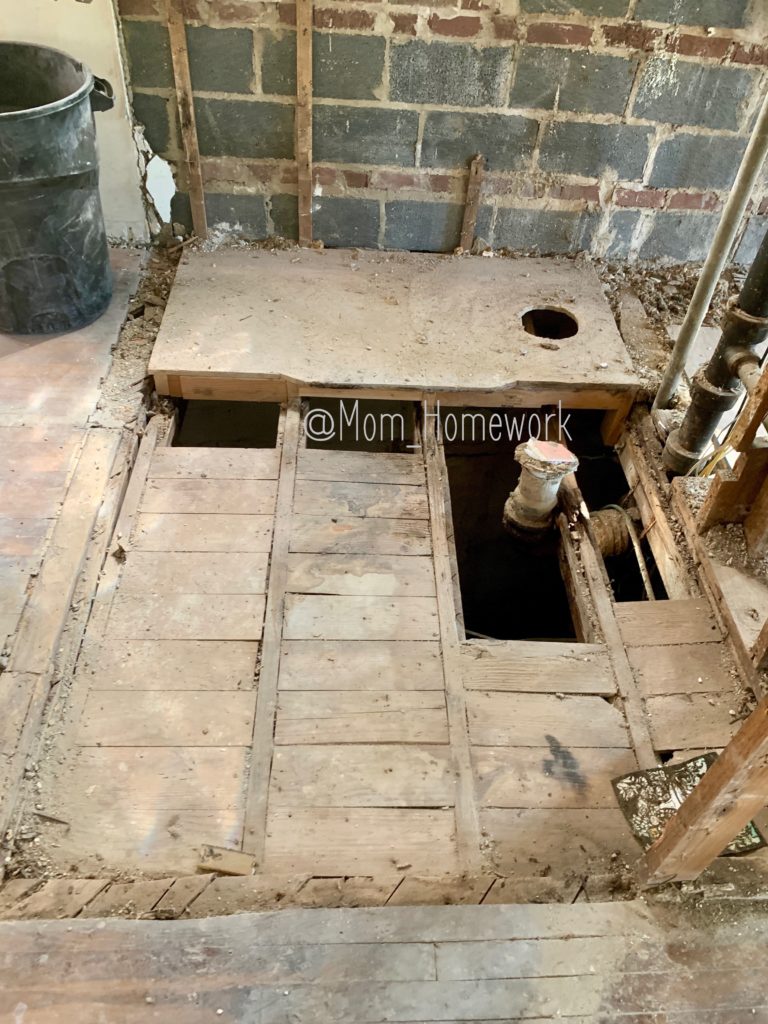
Or the layers of wet wood, under a layer of concrete, under a layer of tile, under a layer of plywood, under a layer of tile, under a layer of leveling concrete, under the vinyl wood-look flooring.
I told you, layers!
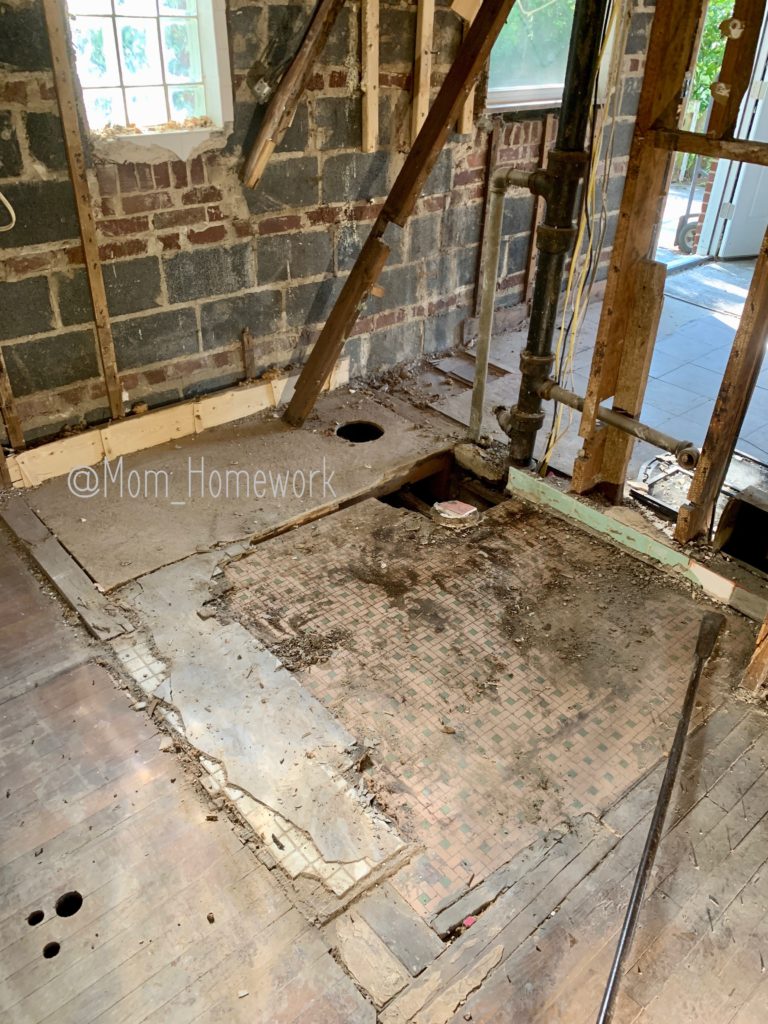
Or the rotten floor joists that mean one day (very soon) the shower and toilet would end up in the basement, hopefully not while someone was using them!

Water from where?
Originally the basement had this bank of cabinets (now, gone) next to a wall (also gone). This closed off the “utility room” from the useable basement.
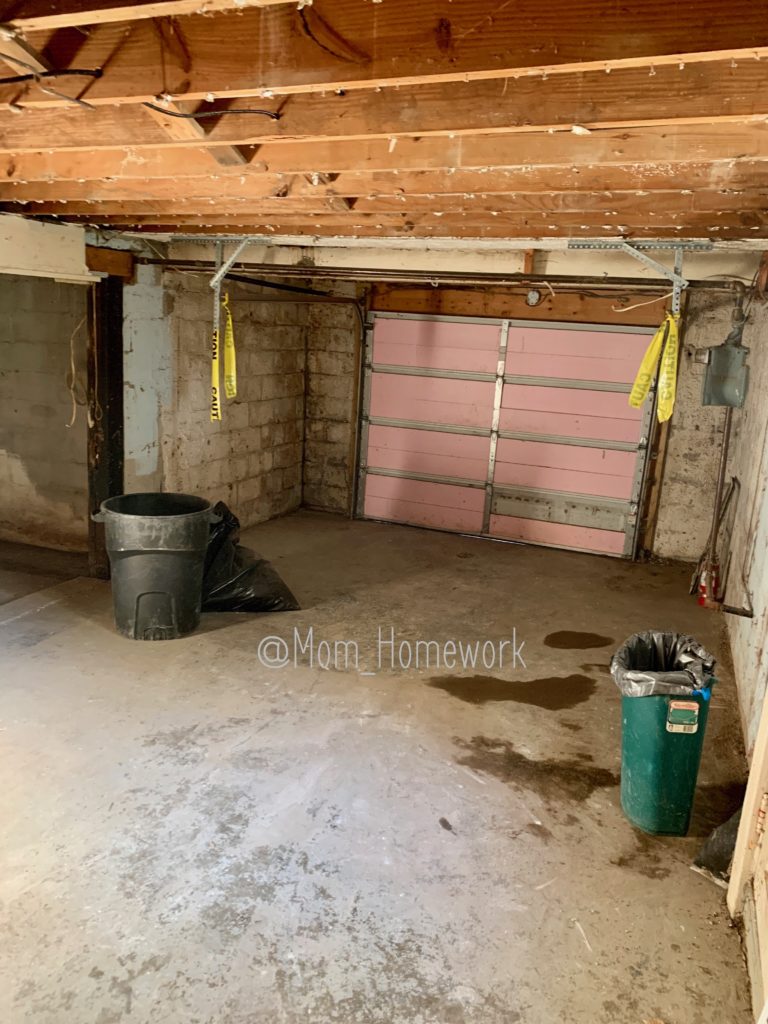
The structural block wall in the garage was opened up. This then allowed access to the laundry room and utility room from the garage. Instead of going through the basement.
Yes, it is strange.
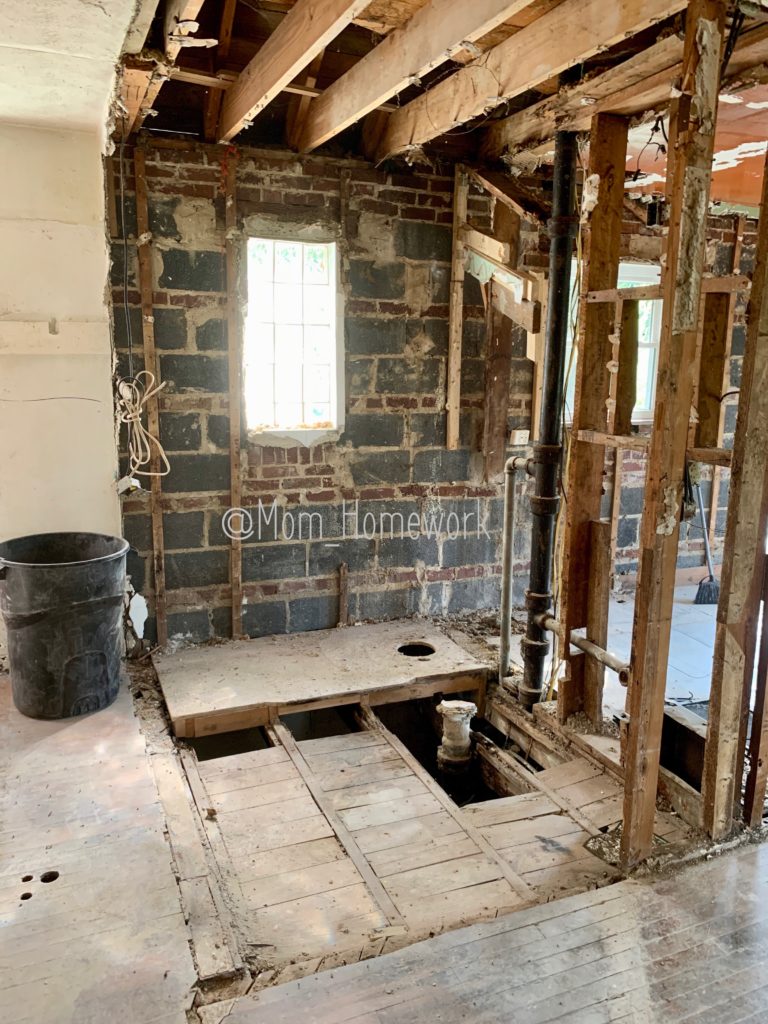
This utility room is where all of the rotten floor joists from the bathroom and kitchen sit.

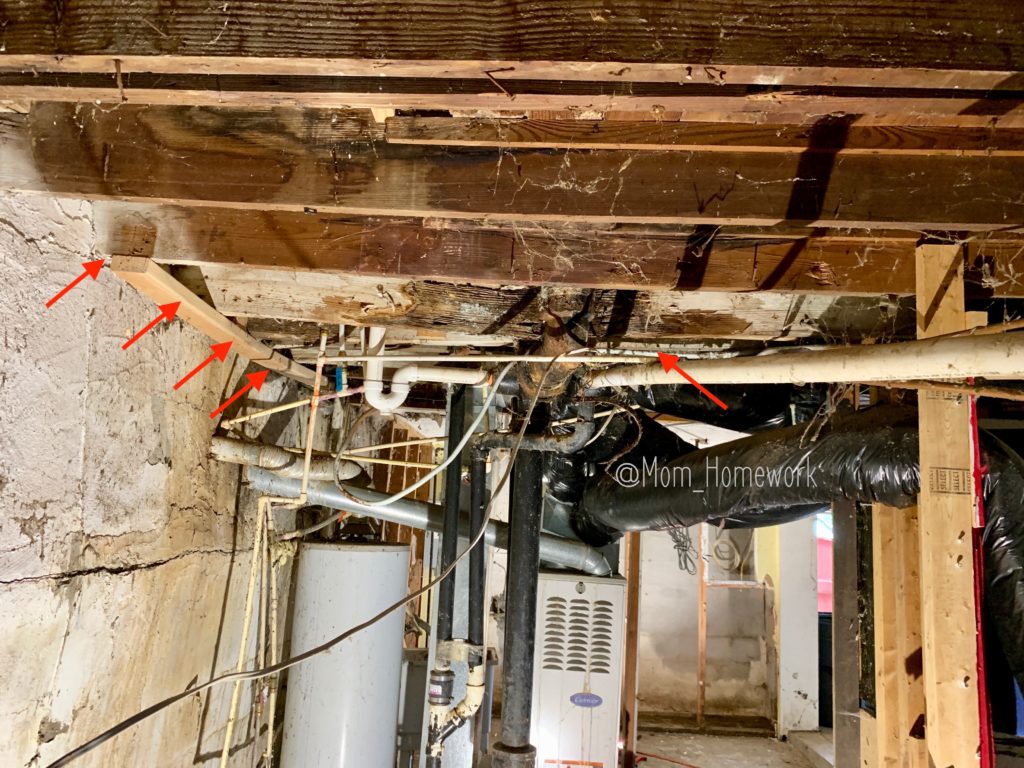
See the 2×4 installed to “fix” everything? This was a known issue. Yet… the layers.
There are at least four floor joists that need to be cut out and replaced.
Scheduled for Wednesday!
Yay for not falling through the floors. (knock on wood, I suppose I still have a few days of opportunity left)
Initially, we thought the water was from the crack in the foundation, and was also coming up through the basement floor.
I began to wonder if it was from the plumbing as things started to dry out.
Here’s what I’ve noticed:
-The hole in the basement wall from the DIY basement fireplace lets water in
-Leaks from DIY plumbing
-Foundation cracks
-Water table- water coming up though the floor?? Possibility
-Bad gutters
-Downspouts that drained DIRECTLY towards the foundation
AND
(last but not least)
-Bad flashing around the chimney.
While it’s hard to pinpoint which of these was most responsible for the water in the basement, because, let’s face it, there’s a lot that was going on and contributing… there are two factors we can blame for the floor joists.
And that brings us to the kitchen.
Kitchen
Here is the kitchen originally. Dropped ceiling hiding bad electric, rotten base cabinets, and see there? A board on the countertop holding up the upper cabinets closest to the door. Layers.
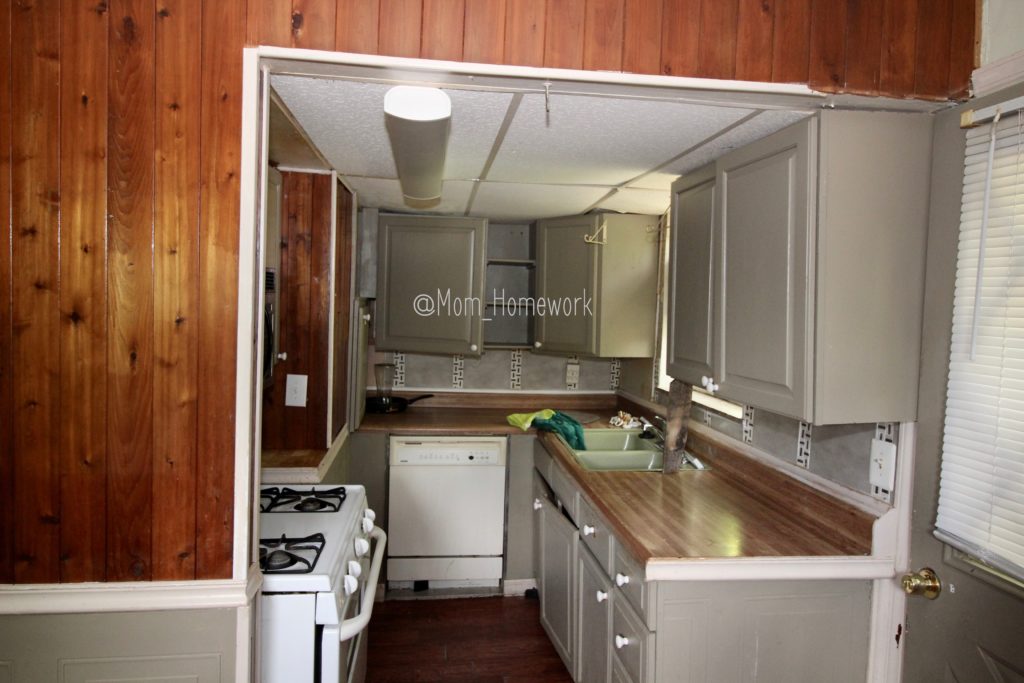
It was kind of cute at first glance. Minus the obvious issues.
I figured the wet cabinet was from bad plumbing. It probably was? But behind the layers of cabinets, tile, and walls, we see this.
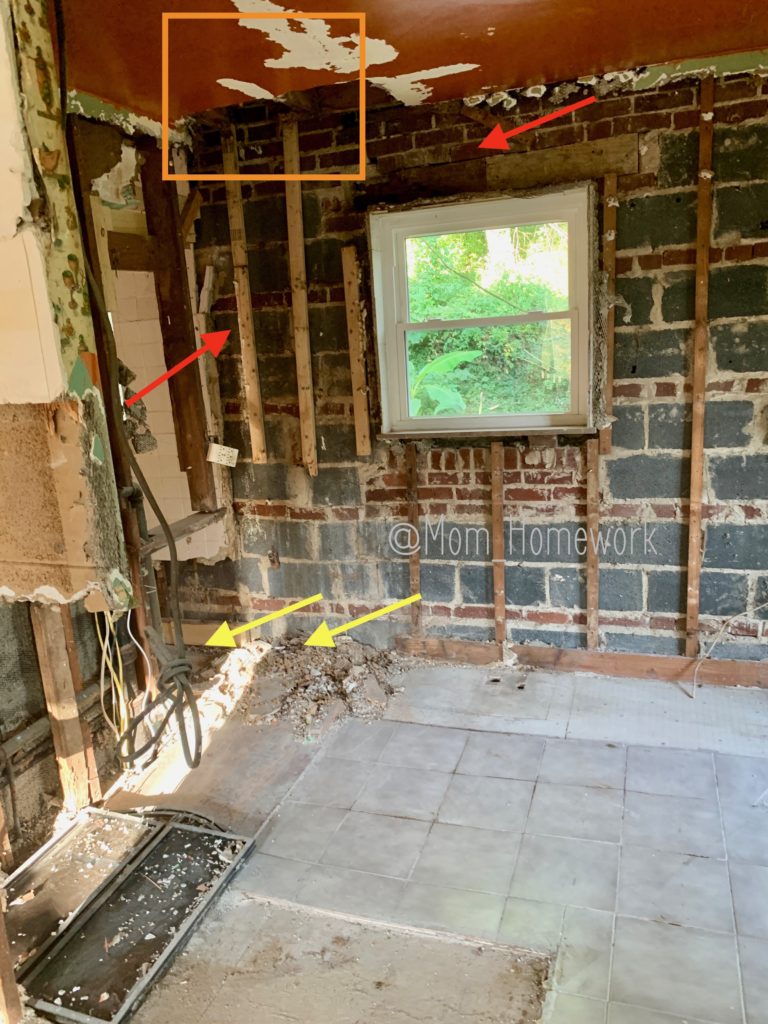
The orange box shows where the flashing was bad against the chimney. The beam is rotten there, and needs to be replaced.
The red arrow near the window shows the header, which is rotten.
The other red arrow shows where the furring strips were replaced previously. This was, again, a known issue. There were about three cans of spray foam shot into the wall space here, it didn’t help with the water penetration.
The yellow arrows highlight the area in the kitchen (the bathroom is right next door) where the floor joists are rotten.
Because this is where the cabinets and dishwasher were located, (potential water source) they weren’t walked on previously.
There was a tangle of plumbing in this area as well. Plumbing leaks + flashing leak + decades = big time damage.
The biggest risk of falling through is in the bathroom, but we are still taking caution in the kitchen.
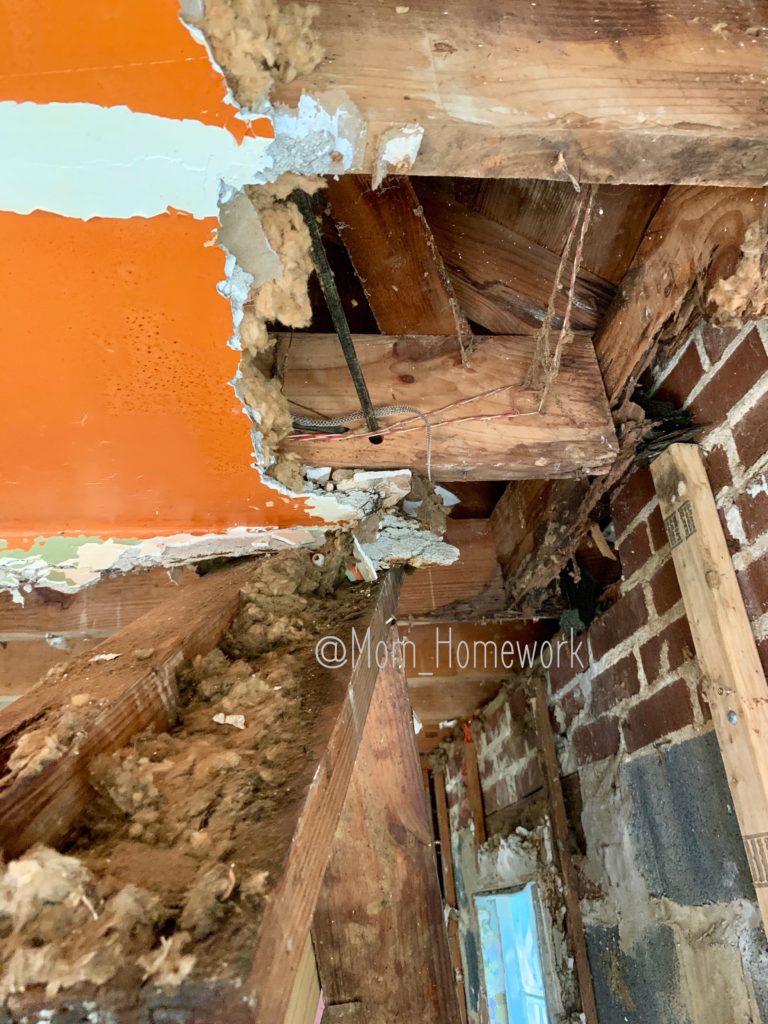
In the above picture you can clearly see the moisture damage on the right.
The wood just falls away when you touch it.
Also,
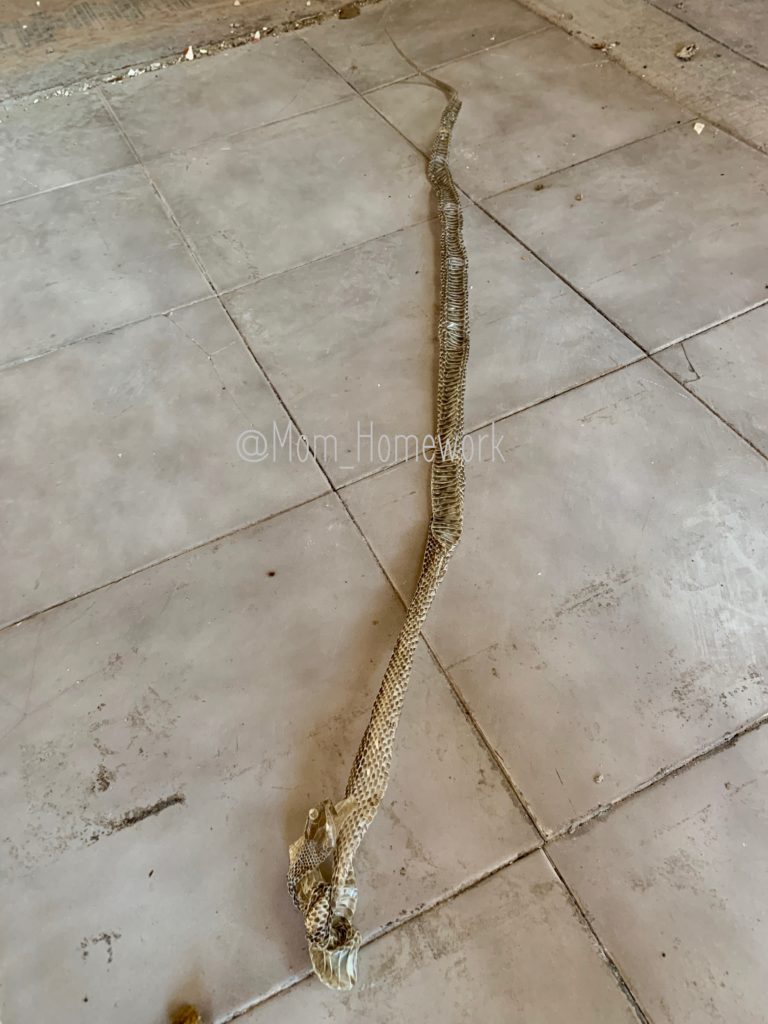
There is a snakeskin tail in the center of the photo.
Yep.
Even freaking snakes have layers!
At least it was empty this time.
I’d rather have an empty snake shell than one full of snake body.
Look, you can see its eye and mouth spot. It’s kind of creepy. Most of the skins I’ve seen are more “beat up” or are “shredded”.
FYI: All comments about how “That looks like a fresh specimen, I bet the snake is in the precise ceiling portion that you plan to take down tomorrow.” will be deleted.
I don’t need that kind of negativity in my life.
I’m starting to feel like Taylor Swift with all of these snakes.
Seriously though, I don’t hate them (strongly dislike?) and know they are beneficial for the environment.
I just don’t like seeing them. Or being near them, or being surprised by them, or having them move in a pile of demo material I am picking up to throw away, or seeing them trying to get into my house.
When we remove them from around our house I have a 4′ snake stick.
Yes, a special grabber device, that I paid money for, to catch them and put them in a bucket for relocation. In accordance with DNR guidelines.
Even though it super feels like they just slither on home since this happens ten?* times a year. Typically in the spring.
*Family, please forget the above. The snakes are all gone now, promise.
Instead of just grabbing a shovel (free) and making sure they never, ever, ever, get back together come back. Aka having my husband do it, because he would.
Snakes are great, when they stay outside.
Spiraling…
The wood flooring is not salvageable. Due to pet staining and warping from moisture, there are too many issues and not enough spare areas of wood available to piece-in fixes.
We have had multiple people come to assess the floors and they all recommend removal.
So, removal it is.
Since we are re-doing the floors on the first floor, we should re-do the flooring upstairs right?
The right side bedroom needed new flooring anyway, and if everything else is going to be new that should match…
In which case, the flooring on the left side bedroom should be removed and made to match the right side bedroom and the rest of the house…
And if THAT is matching, the stairs should be re-done too.
See how quickly (and easily) you can add to the to-do list?
Now, if we back up a second, I can explain.
The stairs were already at “medium” level on my radar of things to fix.
While they are wood, the layout is all wrong, and again, a DIY homeowner special.
Side note: It kind of hurts me to type “DIY homeowner special” because I DIY, but I DIYW.. the W stands for Well. Or DIYC, C for Correctly. Maybe, DIYUTCAB for Up To Code, And Beyond! But that’s getting a bit lengthy.
Back to the stairs.
So at first glance they seem pretty fancy, eh?
Fancy, at least, for this little house.
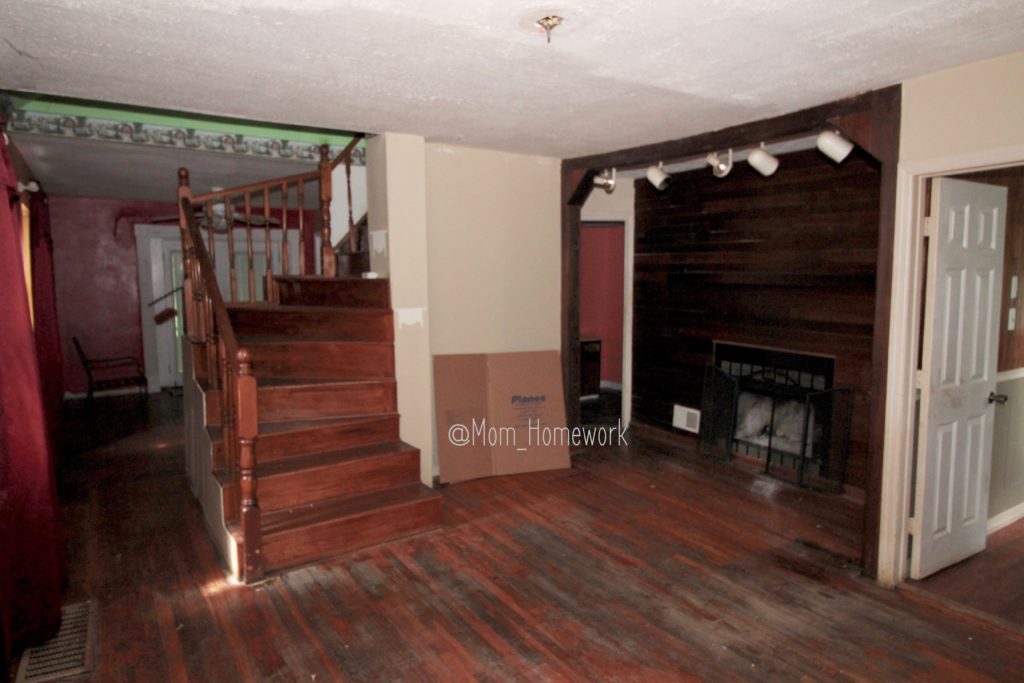
But then, when you look closer (or try to walk up them) you notice that one stair has a rise of 6″ and another a rise of 11″. In fact, none of the step heights are the same.
Fun!
Also, unsafe.
So, the steps are going to go.
New floors upstairs, new steps, new floors downstairs.
Done.
Well, not “done” yet, but decided.
And picked out! Which is half the battle.
Or 1/3, since there’s still removal and installation to come.
Oh yeah, I forgot to mention, we are learning how to install flooring as well. Like a professional, I might add. Should be fun!
*it is a rental, it is a rental, it is a rental* I repeated to myself as I looked over all of the gorgeous flooring options available.
Rounding the bend.
At this point we are almost finished with demo.
I still have to take out the ceiling in the hallway, more ceiling in the kitchen so we can replace the rotten beam, as well as the remaining floor tile in the kitchen. The basement stair wall needs to go, and alllllllll the wood floors need to be ripped out. And the stairs, can’t forget that.
There’s a pile of wood out in the back corner of the yard from who knows what. That needs to go. Along with a few deck pieces that were left behind.
After that?
We should be on track to start piecing everything back together.
The basement structural and waterproofing will be completed next week. HVAC and electric will start mid-week. The shoring up of other structural problems will be underway. And, framing out of the new spaces can begin!
Once you’ve removed everything, there are no more layers available!
We are officially rounding the bend.
And, as a bonus, all of this demo is giving me killer biceps and shoulders, I need another project in the works to keep the gains going!
[ctct form=”250″ show_title=”false”]

Just wanted to let you know I am reading all your blogs. I’m at a lost for words. I wouldn’t even know where to start. I have nothing but admiration for you in all that you do.